Monday, April 29, 2013

Scrapbooking at Maya Angelou Elementary! Our 1st meeting!

Our first scrapbooking event at Maya happened this past Saturday and it was a lot of fun! We were all well behaved and happy in the library! :.)
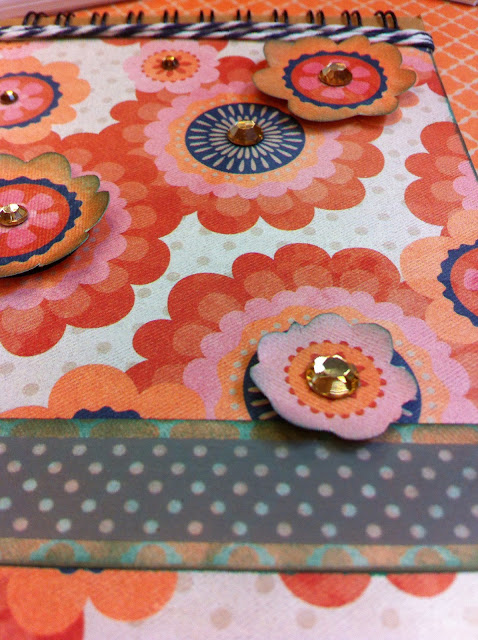
We made picture holders and small notepads decorated with some beautiful paper. We are trying to schedule another fun day before school is out so that we can scrapbook pages! Wanna join us?


Sunday, April 28, 2013

Paper dolls

Who hasn't played with paper dolls? I have! This cute stamp set from Close To My Heart is so adorable!!!!!!!!!!It is a great way to bring the little girl in you or to gift a little girl you love!There are so many possibilities because you can color the clothes and the details in many different ways, creating your own paper doll! Watercolor pencils or CTMH watercolor markers are the perfect match. I love it!


Monday, April 15, 2013

Making your own paper with stamping techniques!

1- Start by using your sponge daubers using the CTMH Ruby ink pad. 2-Stamp your paper using a deeper red. I used CTMH Barn Red. 3- Trim your paper to fit your pin and ink the borders using the barn red ink pad. 4- Add Bitty Sparkles from CTMH.
Add caption

1-To make a rosette, score a strip of paper. 2- glue one extremity to another. 3 & 4- press it towards the center.
Add liquid glass to your rosette, and add a piece of paper in the middle to keep it together. Do that on both sides! Hold it until it is glued! (liquid glass glues it fairly fast)

Ink around the logo.  Add sparkles to bring out the details!

Amy made her own paper using CTMH stamps!

She made this paper as well!

I had a little bit of time to work on my 6 canvases! I stamped on the paper to create a more vivid effect!


Spring Break Adventures!

My spring break was full of home adventures! I had soooo much homework for my masters that I barely did anything else. Besides my busy schedule, I tried to scrapbook a little! This is what I made! I used the 'For always' paper packet from Close To My Heart. I also used the 'For Always' textiles in this project as well! I transformed a dollar clipboard into this beautifuly decorated Close To My Heart clipboard! I used my Cricut CTMH Artiste cartridge to make the flower!


I also had a lot to celebrate after Spring Break! I had my master's thesis oral defense and I passed! It was nerve wracking, but it is over!! Below is a picture of me with the Cougar in the Tri-Cities campus! Go Cougs!
 

Those are beautiful astromerias we bought at Safeway! So fresh! I love red flowers!

To end this post, here is my magnetic board I made using the CTMH textiles! Beautiful and easy to make!


Friday, April 12, 2013

Creating with Canvas

 
I love working with canvas! I am actually working on 6 canvases right now to decorate my craft room walls and I'll post the pictures when they are done! I can't wait to share them!
This is a great video on how to scrapbook on canvas! Have fun!


It’s a Cricut® Party!


Whether you use one Cricut®-cut piece or several, you can create cute party favors and decorations using your Artiste cartridge. Combine your Cricut® pieces with unique stamping techniques and you have projects that will knock your guests’ socks off! Want some recipes and tips for how to make this adorable artwork? Below are instructions for creating two pieces from the “Clearly the Best: How to kiss—with stamps” episode. Combine the Cricut®-cut pieces for these projects with the kissing stamping technique taught in the video, and you have a stellar 3-D item! Want to learn more about the kissing stamping technique? Click here to watch the video.

Recipes and Tips

Party Banner
Stamp set of your choice
X5668 Honey Cardstock
X5764 Pear Cardstock
1272 Cranberry Cardstock
Z2197 Pear Exclusive Inks® Pad
Z2163 White Daisy Exclusive Inks® Pad
Z1751 Baker’s Twine Harvest Assortment
Z1311 1¼" Circle Punch
Cricut® Shapes:
Artiste
1" Shift+3D Object <J> (cut 56, p. 57)
Art Tip! This banner only uses one type of Cricut® shape, but the finished product is still stunning. Use stamp kissing to randomly stamp across the pieces using the stamp set of your choice. Score with the help of the Cricut®-cut score lines on the shape and piece together to create little globes. Tie together with baker’s twine and voila!
Owl Miss You Bag
1385 White Daisy Cardstock
1292 Crystal Blue Cardstock
X5668 Honey Cardstock
X5930 Slate Cardstock
Z2162 Honey Exclusive Inks® Pad
Z2117 Crystal Blue Exclusive Inks® Pad
Z1349 Shimmer Designer Brads
Z1752 Sparkles Clear Assortment
Z1311 1¼" Circle Punch
Twist Ties
Thread
Cricut® Shapes:
Artiste
4½" 3D Object <Hallween> (p. 77)
4½" Shift+3D Object <Boo> (cut 2, p. 77)
1" Shift+Accent 2 <A> (p. 51)
Art Tip! This project uses many Cricut® shapes and all the pieces coordinate so nicely for an adorable finished product. Use the Artiste assembly booklet to put the bag together and then add the embellishments. The feathers are created with punched circles that are stamped using the kissing technique; however, if you don’t have the circle punch, you can easily make these using the Cricut as well. The eyes were created using Shimmer designer brads, but you can use any large brad or button to create the same look. Finish with the “owl miss you sentiment” for a special touch.